Regular cleaning of Ice-O-Matic ice machines is crucial for maintaining efficiency, ensuring hygiene, and extending equipment life․ This process involves descaling, sanitizing, and following specific guidelines to optimize performance․
Overview of Ice-O-Matic Ice Machines
Ice-O-Matic ice machines are high-performance, commercial-grade appliances designed for durability and efficiency․ They produce cube or pearl ice, catering to various hospitality and foodservice needs․ Known for their stainless steel construction and advanced cooling systems, these machines ensure consistent ice production․ Regular maintenance is essential to uphold their functionality and hygiene standards․ The machines operate by circulating water through a cooling system, freezing it into ice, and harvesting it once formed․ Proper care, including descaling and sanitizing, is vital to prevent scale buildup and bacterial growth, ensuring optimal performance and longevity․

Importance of Regular Cleaning and Maintenance
Regular cleaning and maintenance are vital to ensure optimal performance, prevent scale buildup, and maintain hygiene standards in Ice-O-Matic ice machines, prolonging their operational lifespan effectively․
Why Cleaning is Essential for Efficiency
Cleaning is vital for maintaining Ice-O-Matic ice machines’ efficiency․ Scale buildup can impede water flow, reducing ice production and increasing energy consumption․ Regular descaling removes mineral deposits, ensuring proper water circulation and consistent ice formation․ Additionally, sanitizing eliminates bacteria and mold, which can affect ice quality and safety․ A clean machine operates smoothly, produces more ice, and consumes less energy, making routine maintenance a cornerstone of efficiency and reliability․ Neglecting cleaning can lead to poor performance and higher operational costs over time․
Health and Safety Benefits of Sanitizing
Sanitizing your Ice-O-Matic ice machine is critical for health and safety․ Ice machines can harbor bacteria, mold, and slime, which can contaminate ice and pose health risks․ Regular sanitizing eliminates these pathogens, ensuring clean and safe ice production․ This is especially important for commercial settings where ice is used in beverages and food․ Maintaining a sanitized machine also prevents foul odors and tastes, preserving the quality of the ice․ By prioritizing sanitizing, you protect consumer health and uphold high standards of hygiene and safety in your establishment․

Necessary Tools and Supplies for Cleaning
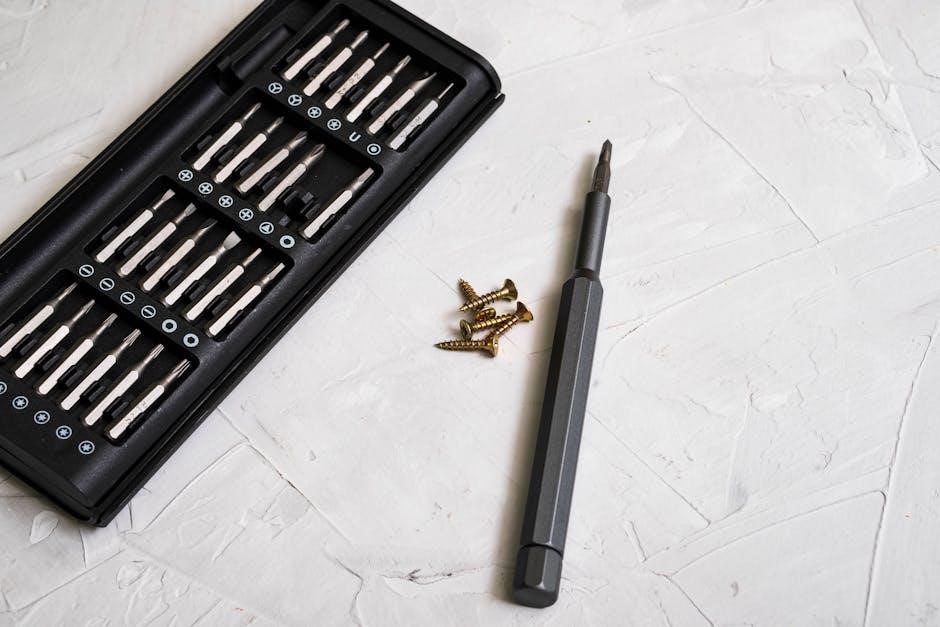
Essential tools include stainless steel cleaner, approved sanitizer, descaling solution, a soft cloth, and a Phillips screwdriver․ These ensure a thorough and safe cleaning process․
Approved Cleaners and Sanitizers
Use only nickel-safe cleaners and sanitizers specifically approved by Ice-O-Matic to avoid damaging internal components․ Descaling solutions should be diluted as per manufacturer instructions to effectively remove mineral buildup․ Sanitizers must be rinse-free to prevent contamination․ Avoid abrasive materials that could scratch surfaces․ Always refer to the Ice-O-Matic website for the most current list of recommended products․ Proper use of these cleaners ensures optimal performance, hygiene, and longevity of the machine․
Equipment Needed for the Cleaning Process
Essential tools include a Phillips head screwdriver for removing panels, a bucket for water and cleaning solutions, and microfiber cloths for wiping surfaces․ Gloves and goggles protect during handling of chemicals․ A descaling solution and approved sanitizer are mandatory for removing mineral buildup and disinfecting․ Ensure all materials are compatible with stainless steel to prevent damage․ Having these items readily available streamlines the cleaning process and ensures effectiveness․ Always refer to Ice-O-Matic’s guidelines for specific equipment recommendations tailored to your machine model․

Preparation Steps Before Cleaning
Turn off the water supply and unplug the machine for safety․ Remove all ice, accessories, and detachable parts․ Ensure the machine is empty and ready for cleaning․
Turning Off the Water Supply
Turning off the water supply is the first crucial step in preparing your Ice-O-Matic ice machine for cleaning․ Locate the water shut-off valve, typically found behind or near the machine, and turn it clockwise to stop water flow․ This prevents any water from entering the system during cleaning․ Ensure the valve is fully closed to avoid leaks or water interference․ Draining any remaining water from the hoses or reservoir is also recommended to prevent contamination․ This step is essential for safety and ensures the cleaning process is effective and free from potential water-related issues․
Removing Ice and Accessories
Before cleaning, remove all ice from the bin or dispenser to prevent contamination during the process․ Scoop out any remaining ice manually or let it melt slightly․ Next, take out any accessories such as the ice slide, sprayer bank, or other removable parts․ These components should be cleaned separately to ensure thorough sanitization․ Store the ice in a clean container if you plan to reuse it, or discard it if it’s old or discolored․ Removing these parts allows for better access to internal areas and ensures a more effective cleaning process overall․

Step-by-Step Cleaning and Sanitizing Process
Initiate a harvest cycle, access the control panel, add descaling solution, and run the cleaning cycle․ Follow manufacturer instructions for proper execution and timing of each step․
Initiating a Harvest Cycle
To initiate a harvest cycle on an Ice-O-Matic ice machine, press and hold the power button for three seconds․ This step prepares the machine for cleaning by draining water from the system․ Ensure the water supply is turned off before starting․ Access the control panel and press the clean button to switch the machine out of off mode․ During the cleaning cycle, the machine will display a solid red and flashing yellow light․ Allow the cycle to complete to ensure proper descaling and sanitizing․ Follow manufacturer instructions for timing and additional steps․
Accessing the Control Panel
To access the control panel of your Ice-O-Matic ice machine, locate the interface typically found on the front or top of the unit․ Press and hold the power button for three seconds to activate the control panel․ Use the buttons to navigate through the menu options․ Select the clean or wash mode to begin the cleaning cycle․ Ensure the water supply is off and the machine is prepared for maintenance before proceeding․ Proper access to the control panel is essential for initiating and monitoring the cleaning process effectively․
Adding Descaling Solution
Mix the approved nickel-safe descaling solution with water according to the manufacturer’s instructions․ Pour the solution into the ice machine’s water trough․ Ensure the mixture is correctly diluted to avoid damage․ After adding the solution, close the trough and allow the machine to circulate the mixture through its system․ This step is critical for removing mineral buildup that can reduce efficiency and cause mechanical issues․ Always follow the recommended dosage to prevent over- or under-dosing, which can affect the cleaning process and machine performance․ Proper descaling ensures optimal operation and longevity of the ice machine․
Running the Cleaning Cycle
Once the descaling solution is added, initiate the cleaning cycle by pressing and holding the power button for three seconds․ The machine will enter a harvest cycle, indicated by a solid red and flashing yellow light․ Allow the cycle to run uninterrupted as the solution circulates through the system․ The process typically takes 30 minutes to an hour, depending on the model․ Do not interrupt the cycle, as this ensures thorough removal of scale and contaminants․ The cycle will complete automatically, preparing the machine for sanitizing․ Ensure the cycle finishes before proceeding to the next steps․

Descaling and Sanitizing Instructions
Descaling removes mineral buildup, while sanitizing eliminates bacteria and mold․ Flush the machine, apply a nickel-safe cleaner, then add sanitizer․ Rinse thoroughly after completion․ Always follow the manual for specific steps and recommended solutions to ensure proper maintenance and hygiene․ Regular descaling and sanitizing are essential for optimal performance and longevity of the ice machine․
Flushing Out the Machine
Flushing is the first step in cleaning an Ice-O-Matic ice machine․ Turn off the water supply and drain the reservoir․ Access the control panel and initiate a harvest cycle to drain all water․ Remove any remaining ice and accessories; Use a cleaning solution or vinegar mixture to flush out internal components․ Allow the machine to run through the cleaning cycle to circulate the solution․ Rinse thoroughly by running clean water through the system until no residue remains․ This ensures all internal parts are free from contaminants and ready for further cleaning or sanitizing․ Regular flushing prevents mineral buildup and maintains efficiency․
Applying Scale Remover
After flushing, apply a nickel-safe scale remover to eliminate mineral buildup․ Dilute the solution as per the manufacturer’s instructions and pour it into the water trough․ Allow the machine to circulate the solution through its internal components for 10–15 minutes․ This process breaks down scale deposits, ensuring efficient water flow and ice production․ Rinse thoroughly by running clean water through the system until no residue remains․ Regular use of a scale remover prevents corrosion and maintains optimal performance․ Always follow the recommended dosage to avoid damaging the machine’s internal parts․
Adding Sanitizer
After descaling, add an approved sanitizer to the water trough, following the manufacturer’s dilution guidelines․ Ensure the solution is specifically designed for ice machines to avoid damage․ Allow the sanitizer to circulate through the system by running a short cycle․ This step eliminates bacteria, mold, and mildew, ensuring a sanitary environment for ice production․ After sanitizing, rinse the system thoroughly with clean water to remove any residual sanitizer taste or odor․ Regular sanitizing ensures the ice produced is safe for consumption and maintains hygiene standards․ Always refer to Ice-O-Matic’s recommendations for approved sanitizers․
Rinsing the System
Rinsing the system is a critical final step after descaling and sanitizing․ Ensure the ice machine is flushed thoroughly with clean water to remove any residual cleaning solutions or sanitizers․ This prevents any chemical taste or odor in the ice․ After rinsing, restart the machine and allow it to produce a few batches of ice, which should be discarded to ensure purity․ Regular rinsing maintains water quality and prevents contamination, ensuring consistent ice production and safety․ Always follow Ice-O-Matic’s guidelines for proper rinsing procedures to maintain optimal performance․
Cleaning Specific Components
Clean the ice bin, dispenser, and accessories regularly to prevent mold and bacteria growth․ Use approved sanitizers and ensure all parts are thoroughly rinsed and dried․
Cleaning the Ice Bin and Dispenser
Remove all ice from the bin and dispenser before cleaning․ Use a mild detergent or approved sanitizer to wipe down surfaces, ensuring no residue remains․ Regularly check for mold or mineral buildup, especially in areas where moisture accumulates․ Flush the dispenser with a vinegar solution to remove scale deposits․ After cleaning, rinse thoroughly with clean water and dry to prevent water spots․ This process helps maintain hygiene and ensures the ice produced remains fresh and contamination-free․ Always follow manufacturer guidelines for specific cleaning agents and procedures․
Sanitizing the Scoop and Other Accessories
Remove the scoop and other accessories from the ice machine․ Wash them with mild detergent and warm water, then sanitize using a food-safe sanitizer or vinegar solution․ Rinse thoroughly to remove any residue․ Regularly inspect for mineral buildup or mold, especially in areas prone to moisture․ Dry the accessories completely before reinstalling to prevent water spots or bacterial growth․ This ensures hygiene and prevents contamination, keeping the ice and surrounding areas clean and safe for use․ Always follow the manufacturer’s guidelines for recommended cleaning agents and frequencies․

Maintenance Tips for Long-Term Efficiency
Regular cleaning, descaling, and monitoring for scale buildup ensure optimal performance․ Schedule routine inspections and follow manufacturer guidelines to maintain efficiency and extend the machine’s lifespan effectively․
Regular Cleaning Schedules
Establishing a consistent cleaning schedule is vital for maintaining Ice-O-Matic ice machines․ Clean the machine monthly using a vinegar solution to remove mineral buildup and sanitize surfaces․ Descaling should be performed at least twice a year, but not more than once a month, depending on water hardness and usage․ Regularly inspect and clean components like the air filter, spray nozzles, and ice bin to ensure optimal performance․ Adhering to these schedules prevents scale buildup, reduces bacterial growth, and maintains efficiency, ensuring consistent ice production and longevity of the machine․ Always follow the manufacturer’s recommended cleaning frequencies for best results․
Monitoring for Scale Build-Up
Regularly monitoring for scale buildup is essential to maintain the efficiency and longevity of your Ice-O-Matic ice machine․ Scale accumulation can reduce performance, increase energy consumption, and harbor bacteria․ Check for visible mineral deposits on surfaces, reduced ice production, or unusual noises, which indicate potential scaling․ Inspect water inlet filters and spray nozzles for blockages․ Test water hardness if possible, as harder water accelerates scale formation․ Addressing scale issues promptly prevents severe damage and ensures consistent ice quality․ Incorporate descaling into your maintenance routine to keep the machine running smoothly and hygienically․

Troubleshooting Common Issues
Common issues include scale buildup, faulty switches, and clogged filters․ Check for blockages, ensure proper water flow, and descale regularly for smooth operation and efficient performance․
Identifying Faults During Cleaning
When cleaning your Ice-O-Matic machine, look for visible scale buildup, clogged water troughs, or faulty components like the float switch․ Ensure all removable parts are cleaned thoroughly․ If the machine fails to initiate a harvest cycle or displays error codes, check the control panel settings․ Always refer to the user manual or manufacturer guidelines for specific troubleshooting steps․ Regular maintenance helps prevent issues, ensuring efficient ice production and longevity of the machine․
Resolving Common Maintenance Problems
Addressing issues promptly ensures optimal performance․ For scale buildup, apply a descaling solution and rinse thoroughly․ If the machine fails to produce ice, check water supply and filter․ Clogged troughs or faulty switches should be cleaned or replaced․ Sanitize all components regularly to prevent mold growth․ Always follow manufacturer guidelines for approved cleaners․ If error codes persist, consult the user manual or contact professional support․ Regular descaling and sanitizing help prevent recurring problems, ensuring reliable ice production and longevity of your Ice-O-Matic machine․

Safety Precautions and Warnings
Avoid immersing electrical components in water․ Use approved cleaning solutions to prevent damage․ Ensure the machine is powered off before cleaning․ Always follow safety guidelines to prevent accidents․
Avoiding Immersion of Electrical Components
Never submerge electrical parts of your Ice-O-Matic ice machine in water, as this can cause irreversible damage or safety hazards․ Always unplug the machine before cleaning to ensure components remain dry․ Use a damp cloth to wipe down exterior surfaces and avoid spraying liquids directly onto electrical areas․ This prevents short circuits and maintains operational integrity․ Proper handling ensures longevity and safety, adhering to manufacturer guidelines for effective maintenance without risking electrical malfunction or user danger․
Using Approved Cleaning Solutions
Always use Ice-O-Matic-approved cleaners and sanitizers to ensure safety and effectiveness․ Avoid abrasive or unauthorized chemicals, as they may damage components or leave harmful residues․ Dilute cleaning solutions according to the manufacturer’s instructions for optimal results․ Apply cleaners to surfaces using a soft cloth or sponge, avoiding direct contact with electrical parts․ Never mix cleaning agents, as reactions may occur․ Refer to Ice-O-Matic’s guidelines for recommended products and dilution ratios to maintain machine integrity and hygiene standards․ This ensures efficient cleaning without compromising performance or safety․
Proper cleaning, descaling, and sanitizing ensure your Ice-O-Matic ice machine operates efficiently and safely․ Always follow manufacturer guidelines to maintain optimal performance and hygiene standards․
Final Checks After Cleaning
After completing the cleaning and sanitizing process, perform a final inspection to ensure all components are clean and properly reassembled․ Check for any residual cleaner taste or odor by running a small batch of ice․ Verify that the machine is functioning correctly, producing ice consistently․ Dispose of any cleaning solutions safely and rinse thoroughly to prevent contamination․ Refer to the user manual for any additional post-cleaning checks․ Ensuring these steps are completed guarantees optimal performance and hygiene for your Ice-O-Matic ice machine․