
Steelcase Cubicle Disassembly Instructions: A Comprehensive Guide
Navigating Steelcase cubicle deconstruction demands a systematic approach, prioritizing safety and efficient component separation for relocation or repurposing efforts․
Safety First: Preparation & Precautions
Before commencing any Steelcase cubicle disassembly, prioritize personal safety and workspace protection․ Wear appropriate personal protective equipment (PPE), including safety glasses, gloves, and closed-toe shoes, to shield against potential hazards like falling parts or sharp edges․
Clear the cubicle area of all personal belongings and ensure adequate lighting․ Communicate the disassembly process to nearby colleagues to prevent accidental interference․ Inspect the cubicle for any loose or damaged components before starting․
Be mindful of electrical and data cables; always disconnect power before handling electrical outlets․ Support panels during removal to prevent tipping․ If lifting heavy components, utilize proper lifting techniques or seek assistance․ A well-prepared workspace minimizes risks and ensures a smoother, safer disassembly process․

Tools Required for Disassembly
Successful Steelcase cubicle disassembly necessitates a curated toolkit․ A standard screwdriver set (Phillips and flathead) is fundamental, alongside an adjustable wrench for various bolt sizes․ A rubber mallet proves invaluable for gently separating connected panels without causing damage․
A utility knife aids in carefully cutting any adhesive or securing materials․ Measuring tape assists in documenting component dimensions for potential reassembly․ Consider a level to ensure proper support removal․
While optional, power tools like a cordless drill/driver and a reciprocating saw can significantly expedite the process, but require careful operation․ Having a label maker and zip-ties for cable management is also highly recommended for organized component separation․
Essential Hand Tools
For a controlled Steelcase cubicle takedown, several hand tools are indispensable․ A comprehensive screwdriver set – including Phillips head, flathead, and potentially Torx bits – is paramount for various fasteners․ An adjustable wrench, covering a range of sizes, handles bolts and nuts effectively․
A rubber mallet provides gentle persuasion when panels resist separation, minimizing damage․ A utility knife carefully cuts adhesives or securing tapes․ Pliers, both standard and needle-nose, assist with cable disconnection and small component manipulation․
Don’t overlook a tape measure for documenting dimensions and a level to verify structural integrity during support removal․ These tools form the core of a safe and efficient disassembly process․
Recommended Power Tools (Optional)
While not strictly necessary, certain power tools can significantly expedite Steelcase cubicle disassembly․ A cordless drill/driver, equipped with appropriate bits, dramatically speeds up fastener removal, especially for high-volume installations․ However, use caution to avoid stripping screws․
An oscillating multi-tool proves invaluable for cutting through stubborn adhesives or separating tightly fitted panels, offering precision and control․ A reciprocating saw, with a metal-cutting blade, can tackle heavier-duty frame components, but requires experienced handling․
Remember, power tools demand heightened safety awareness – wear appropriate eye and ear protection․ Always prioritize control and avoid forcing the tool; let it do the work․
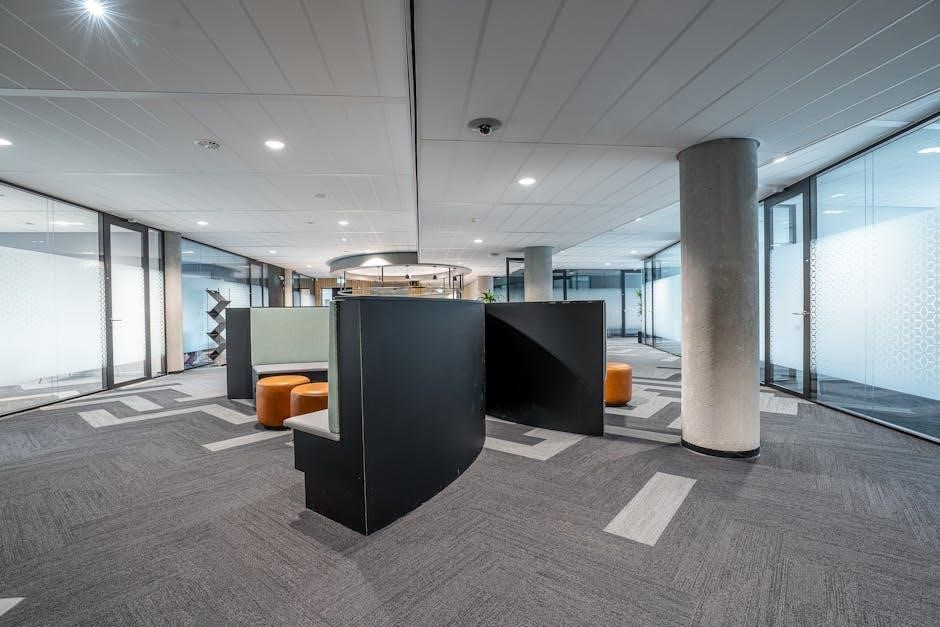
Understanding Your Steelcase Cubicle System
Before commencing disassembly, familiarize yourself with your specific Steelcase cubicle configuration․ Steelcase offers diverse systems – Series 1, Avenue, Vistoria, and more – each with unique connection methods and component designs․ Identifying your system is crucial for a smooth process․
Examine the overall layout; note panel arrangements, worksurface types, and the presence of any specialized components like bookcases or storage units․ Understanding how these elements interconnect will prevent unnecessary force and potential damage․
Consult any available Steelcase documentation, such as installation guides or system diagrams, for valuable insights into the cubicle’s construction․
Identifying Panel Types (Fabric, Panel, Glass)
Steelcase cubicles utilize various panel materials, each requiring a distinct disassembly approach․ Fabric-covered panels typically attach with clips or screws concealed beneath the fabric, demanding careful removal to avoid tearing․ Solid panels, often made of laminate or wood composite, usually connect via bolts or locking mechanisms․
Glass panels necessitate extra caution due to their fragility․ They are generally secured with specialized clamps or brackets and require a gentle touch during removal․ Always inspect for any cracks or weaknesses before handling․
Proper identification prevents damage and ensures a safe deconstruction process․ Note the attachment points and materials for each panel type before proceeding․
Recognizing Common Connection Methods
Understanding how Steelcase cubicle components connect is crucial for efficient disassembly․ Many panels utilize a “cam and dowel” system, requiring rotation to unlock and separate․ Others employ threaded bolts, often concealed behind plastic caps or within panel edges․
“T-nuts” embedded in frame members are frequently used with bolts for secure connections․ Clips, both plastic and metal, are common for attaching fabric or smaller components․ Some systems feature interlocking edges that require gentle prying to release․
Identifying these methods before applying force prevents damage․ Documenting connection types as you disassemble aids reassembly later․
Disconnecting Power & Data Cables
Prioritize safety when disconnecting power and data cables! Always turn off power at the source – circuit breaker or dedicated power strip – before handling electrical connections․ Visually inspect all cables for damage before touching them․
Carefully unplug power cords from outlets, avoiding pulling on the wires themselves․ Data cables (Ethernet, phone) typically have release tabs; gently depress these while pulling․ Label each cable before disconnecting to ensure correct re-connection․
Consider taking photos of the cable arrangement for reference․ Never attempt to disconnect cables if you are unsure of the process; consult a qualified electrician․
Safely Disconnecting Electrical Outlets
Electrical safety is paramount! Before disconnecting any outlet, always verify the power is OFF at the circuit breaker․ Use a non-contact voltage tester to confirm no current is present․ Steelcase cubicles often utilize modular electrical systems․

Outlets may be secured with screws or clips; carefully remove these․ Gently pull the outlet assembly from the panel – avoid forcing it․ Inspect the wiring for any exposed conductors; If wiring appears damaged, do not proceed and consult an electrician․
Label each outlet and its corresponding breaker for easy re-installation․ Document the wiring configuration with photos before disconnection․
Removing Data Cables (Network, Phone)
Proper data cable disconnection prevents damage and ensures a smooth reconnection process․ Begin by tracing cables to their origin point within the cubicle’s raceway system․ Gently disconnect network (Ethernet) and phone cables from the back of devices or wall plates․
Avoid pulling directly on the cable itself; use the connector to release it from the port․ Label each cable clearly – noting its destination (computer, phone, etc․) is crucial․ Consider taking photographs of the cable arrangement before removal․
Coil the cables neatly and secure them with zip ties or Velcro straps to prevent tangling during transport․
Panel Removal: Step-by-Step
Panel removal is a core step, requiring careful attention to connection types․ Start by identifying the panel’s attachment points – typically clips, bolts, or a combination․ Loosen any visible bolts or screws securing the panel to the supporting frame․
Gently lift the panel upwards, or slide it horizontally, depending on the connection method․ Avoid forcing the panel; if resistance is met, re-examine the attachment points․ Have a second person assist with larger panels for stability and safety․
Once free, carefully lay the panel flat on a protected surface to prevent damage during storage or transport․
Disassembling Fabric Panels
Fabric panels often feature a core material within a fabric covering, requiring a delicate approach․ Begin by carefully removing any trim pieces or edging that conceal the connection points․ These are frequently held in place with clips or adhesive․
Inspect for screws or bolts along the panel’s frame, typically located on the rear side․ Once fasteners are removed, gently separate the fabric panel from its supporting structure; Be mindful of staples; use a staple remover if necessary․
Handle the fabric cautiously to avoid tears or stains, and store it flat to maintain its shape․
Removing Panel Panels
Panel panels, typically constructed from solid materials like laminate or wood composite, require a focused disassembly process․ Locate the securing mechanisms – often cam locks, screws, or specialized clips – that attach the panel to the cubicle frame․
For cam locks, rotate them to the unlocked position before attempting to pull the panel away․ Screws should be removed systematically, and clips gently pried loose․ Avoid excessive force, as this could damage the panel or the frame․
Support the panel during removal to prevent it from falling and causing injury or damage․
Detaching Glass Panels (Handle with Care!)
Glass panels necessitate extreme caution during disassembly due to their fragility and potential for causing serious injury․ Always wear safety glasses and gloves when handling these components․
Typically, glass panels are secured with clamps or specialized rubber gaskets within the cubicle frame․ Carefully inspect the attachment points before attempting removal․ Gently loosen any clamps or release the gaskets, supporting the glass panel’s weight throughout the process․
Never apply direct pressure to the glass surface․ Have a second person assist in stabilizing the panel during detachment and transport to prevent breakage and ensure safety․
Worksurface Disassembly
Disassembling the worksurface involves separating it from the supporting frame and removing any attached components like drawers or keyboard trays․ Begin by clearing the entire surface of all personal belongings and equipment․
Locate the fasteners – typically screws or bolts – connecting the worksurface to the cubicle frame․ These are often found along the underside edges․ Carefully remove these fasteners, supporting the worksurface to prevent sudden drops․
Once unfastened, gently lift the worksurface off the frame․ If it’s heavy, enlist assistance to avoid strain or damage; Proceed to detach any integrated components before moving the worksurface for storage or transport․
Removing Desk Components (Drawers, Keyboard Trays)
Prior to full worksurface detachment, remove all attached desk components for easier handling and to prevent damage during disassembly․ Start with drawers; typically, they slide out after disengaging a release mechanism or removing a few screws․
Keyboard trays often utilize sliding rails with locking features․ Identify and release these locks before attempting to pull the tray out․ Some trays may be secured with screws underneath the worksurface․
Carefully inspect for any additional components like pencil trays or accessory holders, removing them as needed․ Organize all removed hardware – screws, bolts, and release levers – into labeled containers to facilitate reassembly later․
Detaching the Worksurface from the Frame
With all desk components removed, detaching the worksurface from the supporting frame is the next crucial step․ Typically, the worksurface is secured to the frame using bolts or screws, often located underneath, along the frame’s perimeter․
Carefully loosen and remove these fasteners, supporting the worksurface’s weight as you do so to prevent dropping or damaging it․ It’s helpful to have a second person assist with this step․

Once all fasteners are removed, gently lift the worksurface off the frame․ Inspect the connection points for any remaining hardware or obstructions․ Store the worksurface in a safe, protected area to avoid scratches or dents during transport or storage․
Pedestal & Storage Unit Disassembly
Pedestals and storage units, often integral parts of Steelcase cubicles, require careful disassembly․ Begin by completely emptying all drawers and locking mechanisms․ Most pedestals are attached to the cubicle frame via bolts or screws, typically found along the unit’s top or sides․
Loosen and remove these fasteners, providing support to the pedestal as it becomes detached to prevent tipping․ Some units may have additional internal connections; inspect thoroughly․
Once free from the frame, focus on the drawers themselves․ Remove them individually, noting any specific release mechanisms․ Disassembly beyond drawer removal is usually unnecessary unless complete component breakdown is required for transport․
Removing Pedestal Drawers

Safely removing pedestal drawers is crucial for efficient disassembly․ Most Steelcase pedestal drawers utilize full-extension slides, often requiring a slight pull and then lifting to disengage from the tracks․ However, some models feature locking mechanisms or release levers – inspect carefully before applying force․
Gently pull each drawer outwards, observing how it detaches․ If resistance is met, check for hidden release catches, typically located on the drawer front or sides․ Once clear of the slides, support the drawer’s weight to prevent damage․

Label each drawer with its original position for easier reassembly․ Repeat this process for all drawers, ensuring a smooth and organized removal․
Separating the Pedestal from the Cubicle Frame
Once the drawers are removed, disconnecting the pedestal from the cubicle frame is the next step․ Typically, pedestals are secured using bolts or screws that connect to the frame’s vertical supports or base plates․ Locate these fasteners – they are often hidden behind access panels or under the pedestal’s top surface․
Using the appropriate tools, carefully loosen and remove these fasteners․ Support the pedestal’s weight as the last screws are removed to prevent it from falling․ Gently slide or lift the pedestal away from the frame․
Inspect for any remaining connections, such as electrical or data cables, and disconnect them before fully separating the pedestal․
Frame Disassembly & Support Removal
With panels and worksurfaces detached, focus on dismantling the cubicle’s supporting frame․ This begins with removing the vertical support posts, usually connected via bolts or specialized connectors at the base plates and top caps․ Carefully loosen these connections, supporting the frame sections to prevent collapse․
Once the vertical supports are free, detach the base plates and feet․ These are often screwed or bolted to the floor or a common sub-structure․ Remember to document the fastener types and locations for easier reassembly․
Handle frame components with care to avoid damage and potential injury․

Removing Vertical Support Posts
Begin by identifying how the vertical support posts connect to both the base plates and the upper panel or worksurface connections․ Typically, these are secured with bolts, screws, or specialized locking mechanisms․ Support the cubicle sections above the posts as you loosen the fasteners to prevent unexpected shifting or collapse․
Use the appropriate wrench or screwdriver for the fastener type, ensuring a secure grip to avoid stripping the heads․ Once all fasteners are removed, gently lift or slide the support posts free․ Note any shims or leveling devices used during installation․
Carefully stack the posts for transport or storage․
Detaching Base Plates & Feet
Base plates are usually secured to the floor using screws, bolts, or adhesive․ Identify the fastening method before attempting removal․ If screws or bolts are used, carefully unscrew them, noting any washers or spacers․ For adhesive-mounted plates, a plastic pry tool can help gently lift the edges without damaging the floor․
Once detached, inspect the floor for any remaining adhesive residue and clean it appropriately․ The cubicle feet, often adjustable, can usually be removed from the base plates with a simple twist or by unscrewing a central bolt․
Organize the base plates and feet for potential reuse or disposal․
Hardware Organization & Labeling
Maintaining organized hardware is crucial for a smooth reassembly process․ As you disassemble, immediately sort screws, bolts, washers, and connectors into labeled containers or bags․ Clearly mark each container with the component it belongs to – for example, “Panel Connector Bolts” or “Worksurface Screws․”

Consider using a simple numbering system to correspond with disassembly steps․ Photographing hardware groupings alongside the disassembled parts provides a visual reference․
Don’t underestimate the importance of labeling even seemingly identical pieces; subtle variations exist․ This meticulous approach saves significant time and frustration during reinstallation․
Sorting Screws, Bolts, and Connectors
Effective sorting prevents mismatched hardware during reassembly․ Begin by separating screws, bolts, and specialized connectors into distinct groups․ Within each group, further categorize by size and head type (Phillips, flathead, Allen)․ Utilize small containers, zip-lock bags, or a hardware organizer with labeled compartments․
Pay close attention to bolt lengths – seemingly similar bolts often differ․ Steelcase frequently employs proprietary connectors; keep these isolated․ Document any unique hardware with photos and notes․
Discard any damaged or stripped fasteners, noting the quantity needed for replacement․ A well-sorted hardware collection streamlines the reassembly process considerably․
Labeling Components for Reassembly
Clear labeling is crucial for a smooth reassembly process․ As panels, worksurfaces, and pedestals are disassembled, immediately apply labels indicating their original location and orientation․ Use masking tape and a permanent marker for easy application and removal․
Number panels sequentially within a workstation․ Note the direction of fabric or laminate patterns․ For complex configurations, sketch a diagram referencing each labeled component․
Specifically mark left/right sides and top/bottom orientations․ Include labels on connecting brackets and hardware bags․ Thorough labeling minimizes guesswork and ensures accurate reconstruction․
Final Cleanup & Disposal Considerations
Once disassembly is complete, a thorough cleanup is essential․ Sweep and vacuum the area, removing all debris, screws, and small parts․ Inspect for any remaining cables or connectors․
Consider responsible disposal options for cubicle components․ Steelcase products often contain recyclable materials; explore local recycling facilities․ Donate usable parts to charities or organizations․
For landfill disposal, check local regulations regarding commercial waste․ Properly package components to prevent damage during transport․ Prioritize environmentally conscious disposal methods whenever possible, minimizing waste and maximizing resource recovery․


About the author