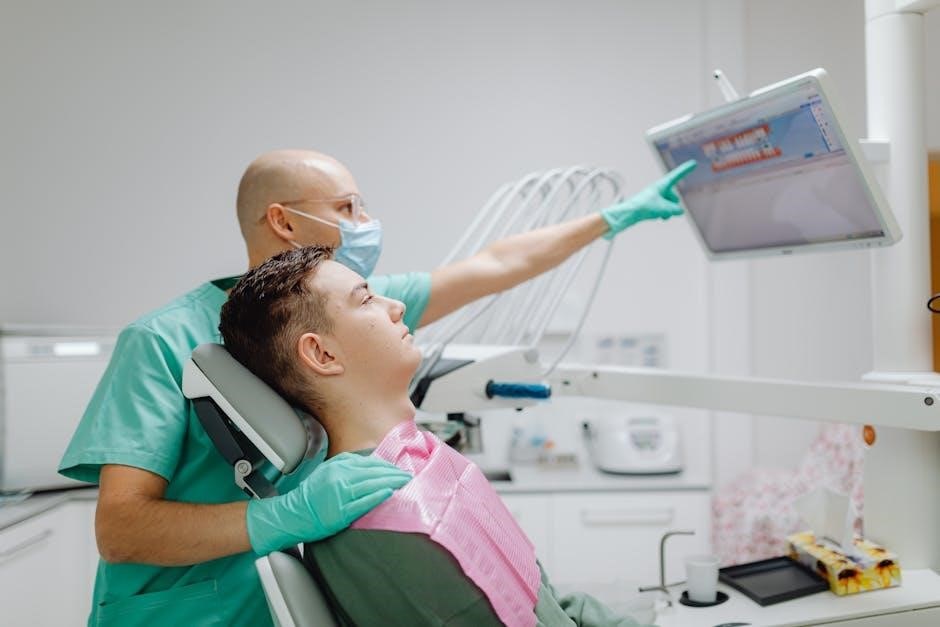
PureWick Male External Catheters provide a non-invasive solution for managing urinary incontinence in men, offering comfort and discretion while protecting skin integrity through advanced suction technology.
1.1 Overview of PureWick Technology
PureWick Technology represents a groundbreaking innovation in urinary management, designed to address the needs of male users with urinary incontinence. The system utilizes gentle suction to effectively collect urine, eliminating the need for invasive catheters. Its design incorporates a soft, flexible catheter and a connected collection canister, ensuring a non-invasive and hygienic solution. The technology is engineered to minimize skin irritation and prevent infections, making it a safer alternative to traditional methods. By integrating advanced materials and a user-friendly design, PureWick Technology promotes comfort, discretion, and improved quality of life for individuals managing incontinence.
1.2 Importance of Male External Catheters
Male external catheters, like PureWick, are essential for managing urinary incontinence in men, offering a non-invasive alternative to indwelling catheters. They prevent skin breakdown and reduce infection risks, promoting better hygiene and comfort. These catheters are particularly beneficial for individuals with limited mobility or those who cannot use traditional catheter styles. By providing a secure and discreet solution, male external catheters enhance quality of life and independence. They are a vital option for patients seeking to maintain dignity and avoid complications associated with invasive urinary management methods.

Indications for Use
PureWick Male External Catheters are designed for men with urinary incontinence, limited mobility, or those unable to use traditional catheter styles, offering a non-invasive solution for urine management.
2.1 Target Population for PureWick
The PureWick Male External Catheter is designed for men experiencing urinary incontinence, including those with limited mobility or chronic conditions. It is ideal for patients who require non-invasive urine management, such as those with spinal cord injuries, neurological disorders, or post-surgery recovery. The device is also suitable for men who cannot use traditional catheters due to medical conditions like inverted penile anatomy. Additionally, it is beneficial for immobile patients in nursing care settings, offering a comfortable and hygienic solution. PureWick is intended for users with male anatomy needing reliable, non-invasive urinary management.
2.2 Conditions That Benefit from PureWick
PureWick Male External Catheters are particularly beneficial for men with urinary incontinence, spinal cord injuries, or neurological disorders affecting bladder control. They are also ideal for post-surgery patients requiring temporary urinary management. Individuals with limited mobility or immobility benefit from the device’s non-invasive design, reducing the risk of skin breakdown. Additionally, PureWick is suitable for men with conditions like prostate issues or chronic urinary retention, providing a comfortable and hygienic solution. It is especially advantageous for patients at risk of skin irritation or infection, promoting wound care and preventing complications associated with traditional catheter use.

How PureWick Works
PureWick uses gentle suction to draw urine through a catheter into a collection canister, providing a non-invasive and discreet solution for urinary management.
3.1 Mechanism of Urine Collection
The PureWick Male External Catheter operates by utilizing gentle suction to draw urine from the penis into a connected collection canister. When the user urinates, the system activates, pulling urine through the tubing and into the canister for storage. This mechanism ensures continuous and non-invasive urine collection, reducing the risk of skin irritation and promoting proper wound care. The suction is calibrated to minimize discomfort while effectively managing urinary output, making it a reliable solution for male users with incontinence or mobility challenges. The system’s design prioritizes ease of use and discreet operation.
3.2 Role of Suction in the System
The PureWick Male External Catheter relies on gentle suction to facilitate urine collection. This suction, provided by the connected collection canister, ensures that urine is efficiently drawn through the tubing and stored securely. The suction mechanism plays a critical role in maintaining continuous flow, preventing leaks, and minimizing discomfort. It is calibrated to avoid causing pressure on the skin or urethra, ensuring a safe and non-invasive experience. The system’s suction design is integral to its effectiveness, enabling discreet and reliable urine management for users with incontinence or mobility challenges. Proper suction ensures optimal performance and user comfort.
3.3 Components of the PureWick System
The PureWick Male External Catheter system consists of a soft, flexible catheter designed for external use, connected to a collection canister via tubing. The catheter is made of medical-grade silicone for comfort and durability. The tubing is anti-kink to ensure continuous flow, while the collection canister is designed for spill-proof storage of urine. A suction mechanism within the canister aids in urine transfer, and the system includes adhesive and securing straps for proper placement. Additional components may include preparation wipes for skin preparation and a drying wipe to ensure optimal adhesion. Together, these components work seamlessly to provide a reliable and non-invasive solution for male users.
Benefits of Using PureWick
PureWick offers reduced infection risks, improved skin protection, and enhanced user comfort compared to traditional catheters, making it a cost-effective and convenient solution for managing incontinence.
4.1 Advantages Over Traditional Catheters
PureWick Male External Catheters offer several advantages over traditional catheters, including a non-invasive design that reduces the risk of urinary tract infections and minimizes skin irritation. Unlike indwelling catheters, PureWick does not require insertion into the urethra, promoting better comfort and reducing the likelihood of complications. Additionally, the system’s suction-based technology ensures efficient urine collection, preventing leakage and skin breakdown. Its external design also allows for easier maintenance and hygiene, making it a more convenient option for long-term use compared to conventional condom catheters or indwelling devices.
4.2 Skin and Wound Care Considerations
Proper skin and wound care is essential when using the PureWick Male External Catheter. The system is designed to minimize skin irritation and promote integrity by reducing prolonged moisture exposure. Users should perform regular perineal care using the included wipes to maintain cleanliness and prevent bacterial growth. Ensuring the skin is dry before application is crucial to avoid adhesive-related irritation. The external design reduces friction and pressure on sensitive areas, lowering the risk of skin breakdown or pressure sores. Regular inspection of the skin and adherence to hygiene practices can help prevent complications and ensure optimal comfort during use.
4.3 Reducing Infection Risks
The PureWick Male External Catheter is designed to minimize infection risks through its closed-system design, which reduces bacterial entry. Proper hygiene practices, such as using the included antimicrobial wipes for perineal care, are crucial. Ensuring the catheter is applied correctly and securely helps prevent urine leakage, which can lead to skin irritation and infection. Regular monitoring and maintenance of the system, including the collection canister, further reduce the risk of bacterial growth. By following the manufacturer’s guidelines and maintaining a clean environment, users can significantly lower the likelihood of urinary tract infections and other complications associated with catheter use.

Preparing for PureWick Use
Preparation involves gathering supplies, ensuring proper hygiene, and readying the user. Use antimicrobial wipes for perineal care and ensure the skin is dry before application to prevent moisture-related issues.
5.1 Gathering Necessary Supplies
When preparing to use the PureWick Male External Catheter, it is essential to gather all necessary supplies to ensure a smooth and hygienic application process. These include the PureWick catheter itself, perineal wipes for skin preparation, a drying wipe to remove moisture from the skin, and gloves for proper handling. Additionally, a lubricant may be required for ease of application, and the collection canister with tubing should be ready to connect. Having all supplies within reach helps minimize delays and ensures the user or caregiver can focus on proper placement and comfort.
5.2 Preparing the Patient or User
Preparing the patient or user is a critical step to ensure the PureWick system works effectively and comfortably. Begin by positioning the patient in a comfortable and accessible position, such as standing or sitting, depending on their mobility. Clean and dry the perineal area thoroughly using the provided perineal wipes to remove any dirt, oil, or residue. Moisture on the skin can interfere with adhesion, so use the drying wipe to ensure the area is completely dry. Assess the skin for any irritation or wounds and address these before proceeding with the application. Proper preparation helps ensure a secure fit and optimal performance of the device.
5.3 Ensuring Proper Hygiene
Ensuring proper hygiene is essential when using the PureWick system to prevent infections and maintain device effectiveness. Always wash hands thoroughly with soap and water before handling the catheter or related components. Use the provided perineal wipes to clean the genital and perineal area, ensuring it is free from dirt, oil, or lotions. After cleaning, allow the area to dry completely, as moisture can interfere with adhesion. If gloves are used, ensure they are sterile and properly fitted. Regularly inspect and clean the device as per manufacturer guidelines to prevent bacterial buildup. Proper hygiene practices help maintain user comfort and system functionality.

Application and Placement
Preparing the user involves cleaning and drying the area thoroughly. Place the catheter correctly, ensuring secure placement without causing discomfort. Proper positioning is key for functionality and comfort.
6.1 Step-by-Step Placement Instructions
To place the PureWick Male External Catheter, begin by ensuring the area is clean and dry. Use the included wipes for perineal care and apply the drying wipe to remove any moisture. Gently position the catheter opening over the urethra, securing it with the adhesive strips provided. Connect the tubing to the collection canister and ensure a snug, comfortable fit. Avoid tightness that could cause discomfort or restrict movement. Check for proper alignment and suction function before finalizing placement. Adjust as needed for optimal comfort and urine collection efficiency.
6.2 Tips for Comfort and Security
Ensure proper fit by selecting the correct size and adjusting the adhesive strips gently. Avoid over-tightening to prevent discomfort or skin irritation. Use the drying wipe provided to remove moisture, enhancing adhesion and comfort. Position the catheter to align naturally with the urethra, minimizing the risk of leakage. Secure the tubing neatly to prevent kinking or tugging. Periodically check the fit and alignment, especially after movement, to maintain comfort and security. Allow for natural movement without restricting the user’s ability to sit or walk comfortably. Ensure the collection canister is properly connected to avoid accidental spills.
6.3 Common Challenges and Solutions
Common challenges include leaks, discomfort, or skin irritation. To address leaks, ensure proper fit and alignment, and use the drying wipe to remove moisture. For discomfort, avoid over-tightening and adjust the catheter position. Skin irritation can be mitigated by allowing skin to breathe between uses and using gentle cleansers. Suction issues may arise if the tubing is kinked or blocked; inspect and clear the tubing regularly. If discomfort persists, consult a healthcare professional for sizing or alternative options. Regular checks and adjustments can enhance overall comfort and security for the user.

Using the PureWick System
Monitor urine output regularly, empty the collection canister as needed, and adjust the catheter for proper fit and comfort. Ensure hygiene practices are maintained consistently.
7.1 Monitoring Urine Output
Monitoring urine output with the PureWick system is crucial for assessing hydration and kidney function. Regularly check the collection canister to measure the amount of urine collected. Note the color, consistency, and volume to ensure proper function. If output is low or discolored, consult a healthcare provider. Always ensure the tubing is securely connected to prevent leaks. Adjust the fit of the catheter as needed for optimal performance. Keeping accurate records of daily output helps track progress and maintain urinary health. Proper monitoring ensures the system works effectively and maintains user comfort and hygiene.
7.2 Emptying the Collection Canister
To empty the PureWick collection canister, always wear gloves and ensure proper hygiene. Open the drainage port at the bottom of the canister and carefully pour the urine into a toilet or designated container. Avoid spills by tilting the canister slowly. After emptying, rinse the canister with sterile water and allow it to air dry to prevent bacterial growth. Regularly cleaning and disinfecting the canister helps maintain hygiene and prevents infections. Always reattach the canister securely to the system to ensure proper function. Proper disposal of waste is essential for maintaining a clean and safe environment.
7.3 Adjusting for Proper Fit
Ensuring a proper fit is crucial for comfort and effectiveness. Start by gently adjusting the PureWick system around the penis, making sure it is snug but not overly tight. Check for any signs of constriction or discomfort, such as redness or swelling. To achieve the best fit, use the adjustable straps provided, securing them firmly but not too tightly. Regularly inspect the skin for irritation or moisture buildup, which can lead to discomfort or complications. If the fit feels off, reposition the catheter slightly and reassess. Proper adjustment helps prevent leaks and ensures continuous suction for effective urine collection. Always follow the manufacturer’s guidelines for optimal results.

Maintenance and Care
Regular maintenance ensures optimal performance and longevity of the PureWick system. Clean the device as instructed, inspect for damage, and store properly when not in use. Always follow manufacturer guidelines for best results.
8.1 Cleaning the Device
Regular cleaning of the PureWick Male External Catheter is essential for maintaining hygiene and preventing infections. Use the provided wipes to gently clean the device, ensuring no residue remains. Avoid harsh chemicals or abrasive materials, as they may damage the catheter. Rinse with sterile water if necessary, but never submerge the device. After cleaning, thoroughly dry the catheter to prevent moisture buildup. Always follow the manufacturer’s guidelines for cleaning and disinfection. If unsure, consult a healthcare professional for proper cleaning techniques to ensure optimal function and user safety.
8.2 Replacing Parts as Needed
Regular inspection of the PureWick system is crucial to ensure optimal performance. Replace any worn or damaged components immediately to prevent leaks or system failure. The tubing, collection canister, and suction interface should be checked for signs of wear. Refer to the manufacturer’s guidelines for specific replacement intervals and instructions. Always use genuine PureWick replacement parts to maintain functionality and hygiene. If unsure about replacement procedures, consult a healthcare professional or the user manual. Timely part replacement helps maintain user comfort and prevents complications, ensuring the system operates effectively and safely.
8.3 Storage and Disposal
Proper storage and disposal of PureWick components are essential for maintaining hygiene and functionality. When not in use, store the device in a clean, dry place, away from direct sunlight and moisture. Use the original packaging if available to protect the catheter and accessories. Dispose of used or damaged parts according to local regulations, ensuring biohazardous materials are handled safely. Recyclable components should be separated and processed appropriately. Always follow the manufacturer’s instructions for disposal to minimize environmental impact and prevent contamination. Proper storage and disposal practices help maintain the integrity of the system for future use.

Troubleshooting Common Issues
PureWick systems may experience leaks, discomfort, or suction issues. Check catheter fit, ensure proper suction, and clean tubing regularly. Consult a healthcare provider if problems persist.
9.1 Addressing Leaks or Discomfort
If experiencing leaks or discomfort with the PureWick Male External Catheter, ensure proper fit and alignment. Check for skin moisture, as this can reduce adhesion and lead to leaks. Use the included drying wipes to prepare the area before placement. Adjust the catheter gently to avoid pressure points. If discomfort persists, consult a healthcare professional to confirm correct sizing and placement. Regular monitoring and timely adjustments can prevent prolonged issues. Addressing these concerns promptly helps maintain comfort and effectiveness of the PureWick system.
9.2 Resolving Suction Problems
Suction issues with the PureWick system may arise due to blockages, kinks in the tubing, or improper connections. To resolve, first, inspect the tubing for any visible obstructions or bends. Gently straighten kinked areas and ensure all connections are secure. If the collection canister is full, empty it according to the manufacturer’s instructions. Check for proper alignment of the catheter to prevent urine flow restriction. If suction problems persist, consult the user manual or contact a healthcare professional for assistance. Regular maintenance and correct usage can help prevent suction-related issues.
9.3 Managing Skin Irritation
Managing skin irritation when using the PureWick Male External Catheter involves regular inspection and proper care. Ensure the skin is clean and dry before application, using the provided drying wipes to minimize moisture. Avoid prolonged use of the same catheter to prevent pressure sores. If irritation occurs, remove the device, cleanse the area with mild soap, and allow the skin to rest. Repositioning the catheter or adjusting the fit may also alleviate discomfort. If irritation persists, consult a healthcare professional for guidance or alternative solutions to maintain skin integrity and prevent further issues;

Cost and Insurance Considerations
PureWick systems may be covered under Medicare and insurance plans, with specific billing codes like A6590 for external catheter supplies. Costs vary by supplier and insurance eligibility.
10.1 Understanding Billing Codes
For billing purposes, the PureWick system uses specific codes to ensure accurate reimbursement. The A6590 HCPCS code is designated for external catheter supplies, effective April 1, 2023. This code applies to monthly supply kits, making it easier for providers to bill Medicare and private insurance. Understanding these codes is crucial for healthcare providers and patients to navigate the reimbursement process smoothly. Always verify eligibility with insurance providers, as coverage may vary. Proper coding ensures timely payment and reduces administrative burdens, making the PureWick system more accessible for those in need.
10.2 Medicare and Insurance Eligibility
Medicare and many private insurance plans cover PureWick systems, recognizing them as medically necessary for managing urinary incontinence. Eligibility typically requires a prescription and documentation of medical need. The A6590 HCPCS code is used for billing external catheter supplies under Medicare. Coverage details vary by insurer, so verifying eligibility beforehand is essential. Patients should contact their insurance provider to confirm reimbursement policies and any out-of-pocket costs. Proper documentation and prior authorization, if required, ensure smooth claims processing. This makes the PureWick system accessible to those who need it while adhering to insurance guidelines.
10.4 Budgeting for Supplies
Budgeting for PureWick supplies involves understanding monthly usage and costs. Patients should review insurance coverage to determine out-of-pocket expenses. Planning a monthly budget based on usage frequency is essential. Many users find bulk purchasing options helpful to reduce costs. Tracking expenses and comparing suppliers can also lead to savings. Regularly reviewing budget plans ensures financial preparedness. This approach helps manage ongoing costs effectively while maintaining access to necessary supplies for urinary management.
PureWick Male External Catheters offer a revolutionary, non-invasive solution for urinary management, blending comfort, discretion, and advanced technology to enhance patient care and quality of life effectively.
11.1 Summary of Key Points
PureWick Male External Catheters offer a non-invasive solution for managing urinary incontinence, combining comfort, discretion, and advanced suction technology to prevent skin breakdown and infections. Designed for male anatomy, they are ideal for users with limited mobility or chronic incontinence. The system ensures continuous urine collection into a canister, promoting dignity and reducing odor. Proper placement and hygiene are crucial for effectiveness and skin health. Regular monitoring and maintenance, such as emptying the canister and cleaning the device, are essential for optimal performance. PureWick is a valuable option for improving quality of life and reducing complications associated with incontinence.
11.2 Final Thoughts on PureWick
PureWick Male External Catheters represent a groundbreaking innovation in urinary incontinence management, offering a non-invasive, comfortable, and hygienic solution for men. By leveraging advanced suction technology, PureWick promotes skin integrity and reduces infection risks, making it a valuable option for users seeking dignity and convenience. While individual experiences may vary, the system has proven to be a significant advancement in continence care, particularly for those with mobility challenges or chronic conditions. PureWick stands out as a practical and effective choice for improving quality of life and addressing urinary health needs.

Additional Resources
Explore manufacturer guidelines, user testimonials, and clinical studies for comprehensive insights into PureWick’s benefits, application, and real-world effectiveness in managing male urinary incontinence.
12.1 Manufacturer Guidelines
The manufacturer provides detailed instructions for the proper use and care of PureWick Male External Catheters. Guidelines emphasize ensuring proper fit and placement to prevent skin irritation and ensure effective urine collection. Users are advised to follow specific steps for application, including cleaning the area and using the provided drying wipes to maintain skin integrity. Regular monitoring of the system is recommended to avoid leaks or discomfort. Manufacturer guidelines also outline the importance of proper storage and disposal of used catheters. Adhering to these recommendations helps optimize the product’s performance and safety, ensuring a positive user experience.
12.2 User Testimonials and Reviews
Users and healthcare professionals have shared mixed experiences with the PureWick Male External Catheter. Many praise its innovative design for managing urinary incontinence, highlighting improved comfort and reduced skin irritation compared to traditional catheters. Some users appreciate the discretion and ease of use, while others note challenges with proper fit and occasional leaks. Nurses often commend its role in preventing infections and promoting wound care. However, a few users express frustration with the learning curve and the need for precise placement. Overall, testimonials reflect a positive reception, though individual experiences vary based on specific needs and conditions.
12.3 Clinical Studies and Research
Clinical studies highlight the effectiveness of PureWick Male External Catheters in managing urinary incontinence. Research demonstrates reduced infection rates and improved skin integrity compared to traditional catheters. A 2019 study cited by 11 sources emphasizes PureWick’s role in optimizing outcomes for incontinent patients, particularly in wound and skin care. These findings underscore the device’s potential to enhance patient comfort and safety in clinical settings, supporting its use as a reliable solution for male urinary management.