RCA Universal Remote⁚ Instruction Manual
This manual provides instructions on how to program and use your RCA Universal Remote․ Learn how to navigate the different programming methods, troubleshoot common issues, and find the right codes for your devices․
This manual includes detailed instructions on using your RCA Universal Remote, covering everything from basic setup to advanced features․ We will cover topics like programming your remote using the automatic or manual methods, troubleshooting common issues, finding the right codes for your devices, and tips for keeping your remote in top condition․
Introduction
Welcome to the world of convenient control with your RCA Universal Remote! This user-friendly device is designed to simplify your home entertainment experience by consolidating multiple remote controls into one․ It’s compatible with a wide range of electronic devices, allowing you to manage your TV, Blu-ray player, cable box, and more with ease․ Whether you’re a tech enthusiast or simply looking for a way to streamline your entertainment setup, this manual will guide you through the process of setting up and using your RCA Universal Remote effectively․
This manual provides comprehensive instructions on programming your remote, understanding its various features, and troubleshooting any issues you may encounter․ We will cover the different programming methods, including automatic code search, manual code entry, and direct code entry․ You’ll also find helpful tips on battery replacement, cleaning, and finding the right codes for your devices․
Ready to take control of your entertainment system with ease? Let’s get started!
Understanding Your Remote
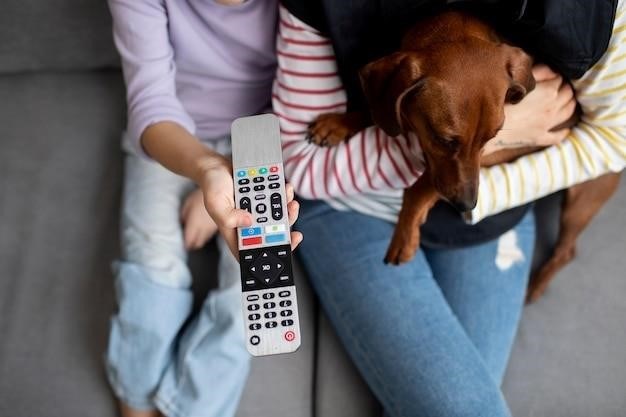
Your RCA Universal Remote is thoughtfully designed to provide a seamless control experience․ It features a layout that’s intuitive and easy to navigate, allowing you to quickly access the functions you need․ Let’s take a closer look at the key components of your remote⁚
- Power Button⁚ This button, typically located at the top of the remote, turns your connected devices on or off․
- Device Buttons⁚ Dedicated buttons for different device types, such as TV, DVD, Cable Box, etc․, allow you to easily switch between them․
- Navigation Buttons⁚ The directional buttons (up, down, left, right) and the center “OK” button are used to navigate menus and select options on your devices․
- Volume Buttons⁚ These buttons control the volume of your audio devices․
- Channel Buttons⁚ These buttons are used to change channels on your TV or cable box․
- Other Function Buttons⁚ Your remote may include additional buttons for specific functions like “Mute,” “Guide,” “Info,” “Play/Pause,” “Fast Forward,” “Rewind,” and more, depending on the model․
By familiarizing yourself with these buttons and their functions, you’ll be well on your way to mastering the control of your entertainment system․
Programming Your RCA Universal Remote
Programming your RCA Universal Remote is a straightforward process that allows you to control multiple devices with a single remote․ There are four main methods to program your remote, each offering varying levels of ease and customization․
- Automatic Programming Method⁚ This method automatically searches for the correct code for your device, making it the quickest and easiest option․
- Manual Programming Method⁚ If the automatic method fails, you can manually enter codes using the remote’s code list․ This requires consulting your manual or using the RCA Remote Code Finder․
- Direct Code Entry⁚ You can directly enter the code for your device if you know it․ This is often the fastest method, but requires finding the correct code․
- Code Search Method⁚ This method involves systematically trying different codes until the remote successfully controls your device․ It can be time-consuming but is effective if other methods fail․
Each of these methods has its advantages and disadvantages, and the best choice for you will depend on your individual needs and preferences․
Automatic Programming Method
The Automatic Programming Method is the easiest way to program your RCA Universal Remote․ It automatically searches for the correct code for your device, eliminating the need for manual code entry․ To use this method, you’ll need to follow these steps⁚
- Turn on the device you want to program⁚ Ensure the device is powered on and ready to receive commands․
- Select the device type on your remote⁚ Choose the button corresponding to the device type you’re programming, such as TV, DVD, or Cable Box․
- Press and hold the “Setup” button⁚ Locate the “Setup” button on your remote and press and hold it․
- Enter the device code⁚ The remote will automatically cycle through codes․ When you see the correct code displayed on the screen, release the “Setup” button․
- Test the remote⁚ Try using the remote to control your device․ If the remote works, you’ve successfully programmed it․
If the automatic method fails to find the correct code, you can try the other programming methods outlined in this manual․
Manual Programming Method
The Manual Programming Method allows you to manually enter the code for your device, giving you more control over the programming process․ To use this method, you’ll need to refer to the code list that came with your remote or find it online․ This list contains codes for a variety of devices, including TVs, DVD players, cable boxes, and more․
Once you have the correct code for your device, follow these steps⁚
- Turn on the device you want to program⁚ Ensure the device is powered on and ready to receive commands․
- Select the device type on your remote⁚ Choose the button corresponding to the device type you’re programming, such as TV, DVD, or Cable Box․
- Press and hold the “Setup” button⁚ Locate the “Setup” button on your remote and press and hold it․
- Enter the device code⁚ Using the number buttons on your remote, enter the four-digit code for your device․
- Test the remote⁚ Try using the remote to control your device․ If the remote works, you’ve successfully programmed it․
If the manual programming method doesn’t work, you can try the other programming methods outlined in this manual․
Direct Code Entry
The Direct Code Entry method is a quick and easy way to program your RCA Universal Remote․ This method requires you to know the specific code for your device, which can be found in the code list that came with your remote or online․ This method is particularly useful if you have already identified the code for your device, and you don’t want to go through the Automatic Programming or Manual Code Search methods․
Follow these steps to program your remote using Direct Code Entry⁚
- Turn on the device you want to program⁚ Ensure the device is powered on and ready to receive commands․
- Select the device type on your remote⁚ Choose the button corresponding to the device type you’re programming, such as TV, DVD, or Cable Box․
- Press and hold the “Setup” button⁚ Locate the “Setup” button on your remote and press and hold it․
- Enter the device code⁚ Using the number buttons on your remote, enter the four-digit code for your device․
- Test the remote⁚ Try using the remote to control your device․ If the remote works, you’ve successfully programmed it․
If you are unsure of the code for your device, you can try the other programming methods outlined in this manual․
Code Search Method
The Code Search method is a handy option when you don’t know the specific code for your device․ This method involves systematically searching through a range of codes until you find the one that works for your device․ While it may take a bit longer than other methods, it offers a reliable way to program your remote․
Here’s how to program your RCA Universal Remote using the Code Search method⁚
- Turn on the device you want to program⁚ Make sure the device is powered on and ready to receive commands․
- Select the device type on your remote⁚ Choose the button corresponding to the device type you’re programming, such as TV, DVD, or Cable Box․
- Press and hold the “Code Search” button⁚ Locate the “Code Search” button on your remote and press and hold it․
- Press the device button repeatedly⁚ While holding the “Code Search” button, repeatedly press the button on your remote that corresponds to the device type you’re programming․ Each press will cycle through different codes․
- Test the remote after each code⁚ After each press of the device button, try using the remote to control your device․ If the remote works, you’ve found the correct code․
- Release the “Code Search” button⁚ Once you find the correct code, release the “Code Search” button․ Your remote is now programmed․
If you still can’t find the correct code, you can try the other programming methods outlined in this manual․
Troubleshooting
While RCA Universal Remotes are generally reliable, you might encounter some issues from time to time․ Here are some common problems and their solutions⁚
Remote not responding⁚
- Check the batteries⁚ Ensure the batteries are properly installed and have enough power․ Replace them if necessary․
- Clear the remote’s memory⁚ Some remotes have a “Clear Memory” button․ Pressing this button will erase all programming and allow you to start fresh․
- Try a different code⁚ If you’re using a code that doesn’t work, try a different one from the code list․
- Verify the device’s power⁚ Make sure the device you’re trying to control is turned on and receiving power․
Remote only controlling certain functions⁚
- Check the code⁚ Verify that the code you’re using matches the specific function you’re trying to control․
- Reprogram the remote⁚ If you’ve recently changed batteries or cleared the remote’s memory, you may need to reprogram it․
Remote buttons not working⁚
- Clean the remote⁚ Dust and debris can interfere with the remote’s buttons․ Clean the remote with a soft, damp cloth․
- Try a different remote⁚ If you have another RCA Universal Remote, test it to see if it works with your device․ This will help determine if the issue is with the remote or the device itself․
Tips and Tricks
Here are some helpful tips and tricks to enhance your experience with your RCA Universal Remote⁚
- Organize your codes⁚ Keep a record of the codes you use for each device․ This will save you time and frustration when reprogramming or troubleshooting․ You can create a simple list or use a spreadsheet for this purpose․
- Use the “Code Search” function⁚ If you don’t know the code for your device, use the “Code Search” function on your remote․ This will automatically search through all the available codes until it finds the correct one․
- Test the remote after programming⁚ After programming your remote for a device, test it thoroughly to ensure all buttons and functions are working correctly․
- Avoid using multiple remotes⁚ If possible, try to consolidate your remote control needs into one RCA Universal Remote to simplify your entertainment setup․
- Keep your remote clean⁚ Dust and debris can interfere with the remote’s functionality․ Clean it regularly with a soft, damp cloth․
- Store your remote properly⁚ When not in use, store your remote in a dry, cool place to prevent damage․
By following these tips, you can ensure your RCA Universal Remote continues to function smoothly and provides you with a seamless entertainment experience․
Battery Replacement
Replacing the batteries in your RCA Universal Remote is a simple process․ Here’s how to do it⁚
- Locate the battery compartment⁚ The battery compartment is typically located on the back or bottom of the remote․ It may be secured by a sliding cover or a small latch․
- Remove the batteries⁚ Gently slide the battery cover open or release the latch․ Remove the old batteries from the compartment․
- Insert new batteries⁚ Insert two new AAA alkaline batteries into the compartment, making sure to align the positive (+) and negative (-) ends correctly․
- Replace the battery cover⁚ Close the battery compartment cover or latch it securely․
Remember to dispose of old batteries properly, and avoid using rechargeable batteries as they may not provide enough power for your remote․ Always use high-quality alkaline batteries for optimal performance․
Cleaning and Maintenance
Keeping your RCA Universal Remote clean and well-maintained ensures optimal performance and longevity․ Follow these simple steps to maintain your remote⁚
- Regular Cleaning⁚ Wipe the remote with a slightly damp cloth to remove dust and grime․ Avoid using harsh chemicals or abrasive cleaners as they can damage the surface․
- Button Cleaning⁚ For stubborn dirt or sticky buttons, use a cotton swab dipped in rubbing alcohol․ Avoid getting alcohol on the remote’s screen or other electronic components․
- Battery Compartment⁚ Clean the battery compartment regularly to prevent corrosion․
- Storage⁚ Store your remote in a dry place away from direct sunlight and heat․
Remember, modifying or tampering with the remote’s internal devices can cause malfunction and void its warranty․ Always handle your remote with care and follow these simple maintenance tips to ensure its longevity․
Finding Codes
To program your RCA Universal Remote, you’ll need the correct device codes․ These codes are specific to each brand and model of your electronic devices, allowing the remote to control them․ Here are some ways to find the codes you need⁚
- RCA Remote Code Finder⁚ This online tool is a valuable resource for finding device codes․ Simply select your RCA remote model and search for the brand and model of your device․
- RCA Universal Remote Manuals⁚ Many RCA Universal Remote manuals contain code lists for various devices․ You can often find these online or in the manual that came with your remote․
- Device Manuals⁚ Check the user manual of your TV, DVD player, or other devices․ They may include a list of compatible remote codes․
- Online Forums⁚ Online forums dedicated to electronics or home theater often have sections for discussing remote control codes․ Search for your specific device model and see if other users have shared codes․
Remember, the code you need will vary depending on your specific RCA remote model and the brand and model of your device․
RCA Universal Remote Models
RCA offers a variety of universal remote models to suit different needs and budgets․ These remotes are designed to control multiple devices, simplifying your home entertainment setup․ Here are some of the popular RCA Universal Remote models⁚
- RCA RCR3273⁚ This model is a 3-device universal remote with a simple design and easy programming․ It features auto code search, manual code search, and direct code entry methods․
- RCA RCU800⁚ This 8-component universal remote offers comprehensive control over your home theater system․ It features backlit keys, automatic code search, and manual code entry methods․
- RCA RCR414BHE⁚ This model is a 4-device universal remote with a sleek design and intuitive controls․ It includes automatic code search, manual code search, and direct code entry options․
- RCA RCRN04GR⁚ This remote is designed to control up to four devices and features a user-friendly interface with easy-to-understand buttons․
Before purchasing an RCA Universal Remote, consider your specific needs, such as the number of devices you want to control and the features you require․
RCA Remote Code Finder
The RCA Remote Code Finder is an invaluable tool for programming your RCA Universal Remote․ It provides a comprehensive database of codes for various electronic devices, allowing you to quickly and easily control them with your remote․ This database is regularly updated to include new device models and manufacturers․
To use the RCA Remote Code Finder, you’ll typically need to know the model number of your remote control and the brand and model of the device you want to program․ You can find your remote’s model number printed on the bottom or back of the remote․ Once you have this information, you can search the code finder database for the corresponding code․ The RCA Remote Code Finder can be accessed online through the RCA website or through various third-party websites that specialize in universal remote programming․